Atura: Getting Started
At Atura, we often work with partners that build AI assistants for their clients. In these instances, some of the initial setup is performed by us, and some steps are performed by you, our channel partner. It is also possible for Atura to perform all the steps outlined below, including building the bot, depending on the project needs. Please indicate if this is preferred when you get in touch.
Setup steps are described below, with each section tagged either "Channel Partner" or "Atura" to denote who would be responsible when working in a partnership.
Environment Creation (Atura)
Each client usually has three environments: DEV (a quickly changing environment for developers), QA (for testing), and PRODUCTION (for the user-facing AI assistant).
We create the new bot environments for you and share the settings file that is used for configuration. While an AI Assistant can be developed and tested locally in Microsoft's Visual Studio, it still requires some cloud infrastructure, such as the service bus, to be in place.
Usually a local Visual Studio "debug" bot will use the same environment settings as used to configure the DEV environment bot running on Microsoft's Azure cloud platform.
Azure Resource Group
PowerShell scripts are used to quickly create new environments. The type and purpose of the required Azure components is described in detail in the ARCHITECTURE section.
Each client usually has three resource groups: "Dev", "QA" and "Production" - One resource group for each environment. For example, BankX (our fictional financial services client) will have three resource groups called: "Atura_RG_bankxDEV", "Atura_RG_bankxQA" and "Atura_RG_bankxPROD".
The following images show the automatically-generated default components included in a new Developer environment:
Azure Active Directory
We also create an Azure Active Directory for each client, for use across resource groups. The Active Directory is the store for Atura's Service Desk user's details (the "consultants"). Consultants must be added to this Active Directory instance before they are able to access the Service Desk. If required, an Atura AI assistant can be synchronised with a client's on-premises Microsoft Active Directory using Azure's AD Connect tool. Read the ARCHITECTURE section for more details of possible integration points.
Developer Environment Prerequisites (Channel Partner)
In order to develop AI assistant bots using the Atura Core and Microsoft Bot Framework, developers need to have (at a minimum) the following tools installed:
- Visual Studio 2017 (not edition-specific)
- Microsoft Bot Framework Emulator - https://github.com/Microsoft/BotFramework-Emulator/releases
- js (LTS version) - https://nodejs.org/en/
Bot Creation (Channel Partner)
With a DEV environment in place, you can create an AI assistant that connects to that environment. You will be able to provide any functionality required since AI assistant bots are written in C# (using the Atura DLLs), making them very flexible and unit-testable.
In order to create a new AI assistant, you will need to follow the procedure described below. Atura will provide a link to the latest VSIX installer package, and a settings file for your DEV environment.
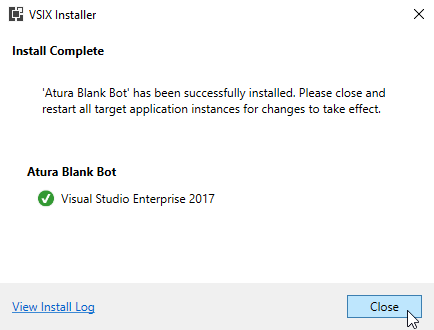
Install the Atura VSIX package
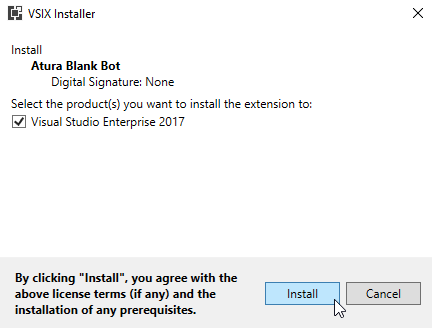
Download the VSIX package onto a developer machine (with Visual Studio 2017).
Double-click the package to start installation. Follow the prompts, then restart Visual Studio.
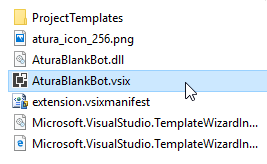
Create a new Atura Blank Bot project
Once you have installed the Atura VSIX package, you will see a new Atura project type in Visual Studio's "New Project" dialog (in the Visual C# section):
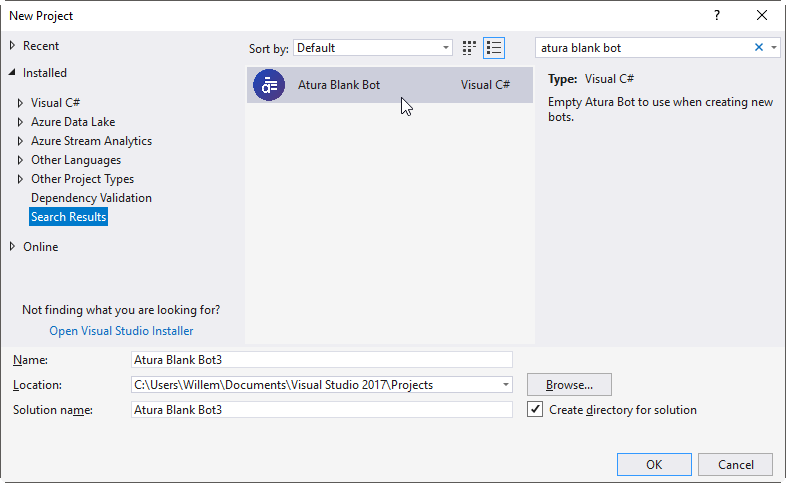
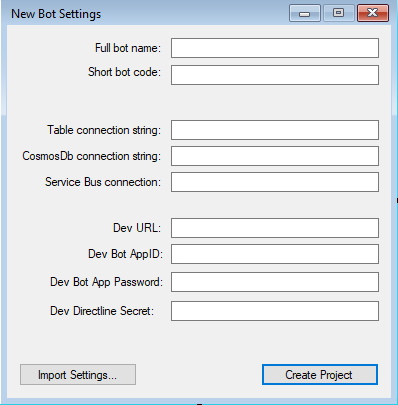
Choose the "Atura Blank Bot" project type and, on the next screen, import the settings file we provided. This will ensure that the new bot is initialised with default settings that connect to your DEV bot environment/resource group on Azure.
NuGet
Once you have installed the NuGet dependencies (see below), you will have an AI assistant bot that you can immediately run and connect to using the Bot Framework emulator. Refer to the Context Engine section of these documents for details on how to build a bot on the Atura framework.
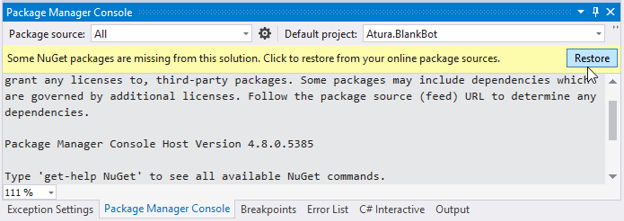
Ensure that all the Atura Core and Azure dependencies are installed by restoring the NuGet packages before running your AI assistant bot. This can be done by clicking on "Restore" in the Visual Studio Package Manager Console:
npm and webpack
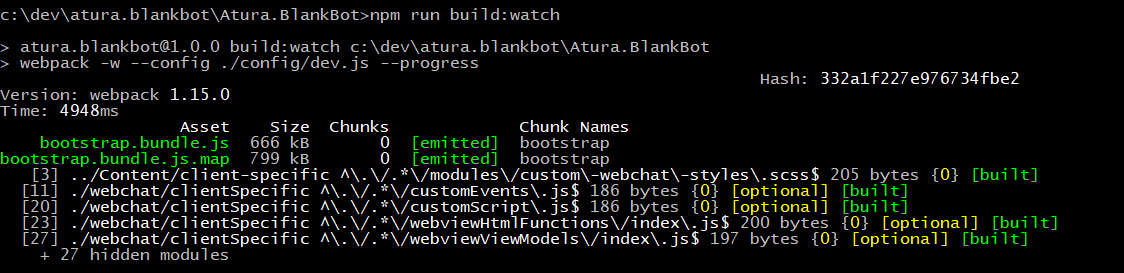
If you intend to use the webchat widget on a website, it must first be built using webpack. To do so, open a command prompt, navigate to the AI assistant's folder and run the following:
c:\dev\MyBot>npm install
Then:
c:\dev\MyBot>npm run build:watch
The process should indicate that the JavaScript bundles were generated successfully, and that it is watching for further script changes:
Updates
Atura frequently releases updates to the Atura Core NuGet and npm packages. We use semantic versioning - our versions have the following structure: Major.Minor.Patch.Build. When deciding whether or not to upgrade to a new version you can assume that we follow these rules to increment versions:
- ··Major - when incremented, the version will contain breaking changes and may require rewriting of some code.
- ··Minor - when incremented, the new version may contain new features, but existing features should still work as-is without any changes being required.
- ··Patch - the version contains backwards compatible bug fixes only.
- ··Build - only indicates a new build.
Please note that in semantic versioning, version 3.1.0 is newer than 3.0.999, and 4.0.0 is newer than 3.999.999.
It is important to note that the NuGet and npm packages should be updated in sync. For example, when using Core NuGet package version 2.1.0.599, the npm package that should be referenced is 2.1.0-599 (the two being distinguishable by a dot between the patch and the build number in the NuGet package version, whereas the npm package has a dash in the same place).
NuGet and npm package sources
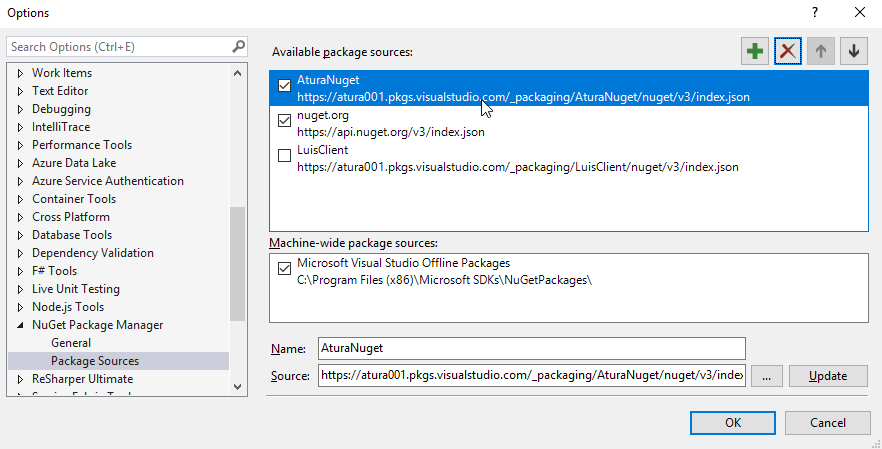
Atura NuGet and npm packages are stored in a private repository. When you create a new AI assistant bot with the Atura VSIX template, packages should be pulled automatically from our source. However, if this ever needs to be debugged, please ensure that the "AturaNuGet" package source is listed and enabled in Visual Studio → Options → NuGet Package Manager → Sources, as shown below. Repository connections are specified in the .npmrc and NuGet.config files.
Embedding On Another Website (Channel Partner)
While still under development, an AI assistant can be tested directly on the Bot website by navigating to the base URL. For example, the "EVA" AI assistant is rendered on its own empty page at the root of the bot web service.

However, an AI assistant is much more useful when embedded on a website. To do this, add the following two elements to the desired website, before the closing <body/> tag:
<div data-webchat-name="Your three letter bot code"></div>
<script id="atura-script" src="The full URL to bootstrap.bundle.js"></script>
These elements load a script that allows the AI assistant to embed itself on the page. Minimal JavaScript is used to do this and no Iframes are used.
Adding Allowed Host for CORS
In order for the client's website to successfully call out and load the necessary Atura script, the client's website must be added to the AI assistant's client.config file. If this is not done, the user's browser will not load the script and will throw a "CORS" exception.
Add the client's website to the <allowedDomains\> element in client.config using the following snippet:
<allowedDomains>
  <add host="localhost" originUrl="http://localhost:53917">
  <add host="localhost" originUrl="http://localhost:64279">

  <add host="azureprozen1bot.azurewebsites.net" originUrl="azureprozen1bot.azurewebsites.net">
  <add host="azureprozen1admin.azurewebsites.net" originUrl="azureprozen1admin.azurewebsites.net">
</allowedDomains>
Deployment Pipeline (Atura)
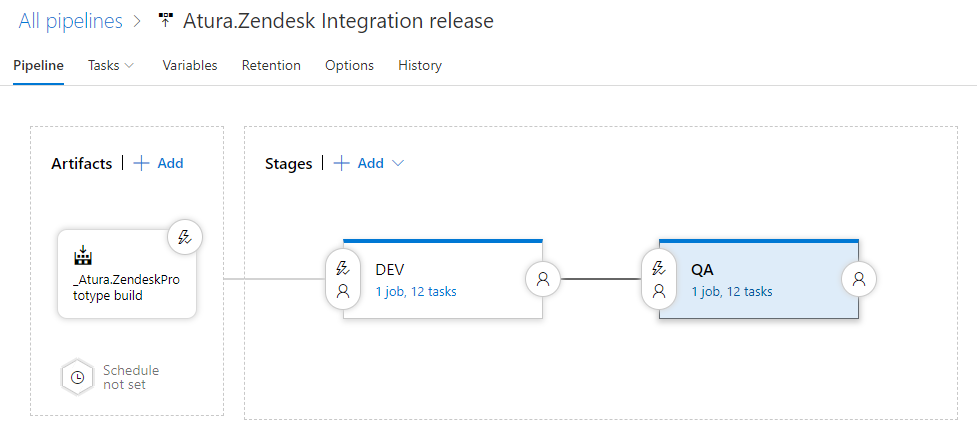
Atura uses Visual Studio Team Services (VSTS) as a deployment pipeline that builds and deploys your AI assistant to your DEV, QA and PRODUCTION environments. All we require is connectivity details to the source code repository so that the build can be triggered whenever there are changes. We can also create users for your team so that you can control deployments to your Azure environments.
Atura typically maintains the deployment pipelines. Below are some examples of what the build and release processes looks like at the time of writing (for an internal "Zendesk Integration" AI assistant):